# Adding and Editing Components
{% stepper %}
{% step %}
#### Component Setup
Open your character Blueprint and add **AC\_PhoneComponent** and **AC\_BankAndShop**.
{% endstep %}
{% step %}
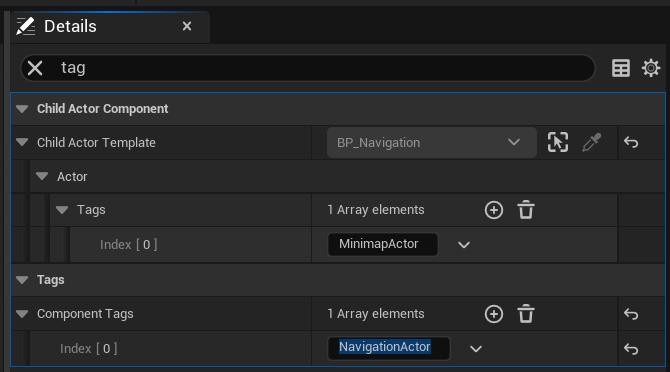
#### Navigation Setup
Add a Child Actor Component and select **BP\_Navigation** as the class. Then search for `tag` and add the **NavigationActor** tag.
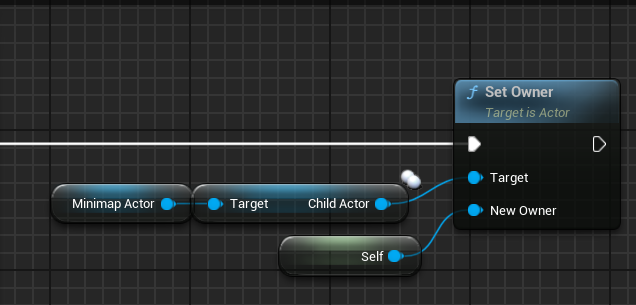
\*After adding the component, you must go to your Character Blueprint's BeginPlay event. Get the Child Actor Component and use the Get Child Actor node to get the minimap actor reference. Then, use the Set Owner node and set your character (Self) as the New Owner. This is required for the minimap to track your location and rotation.
{% endstep %}
{% step %}
#### Camera Setup
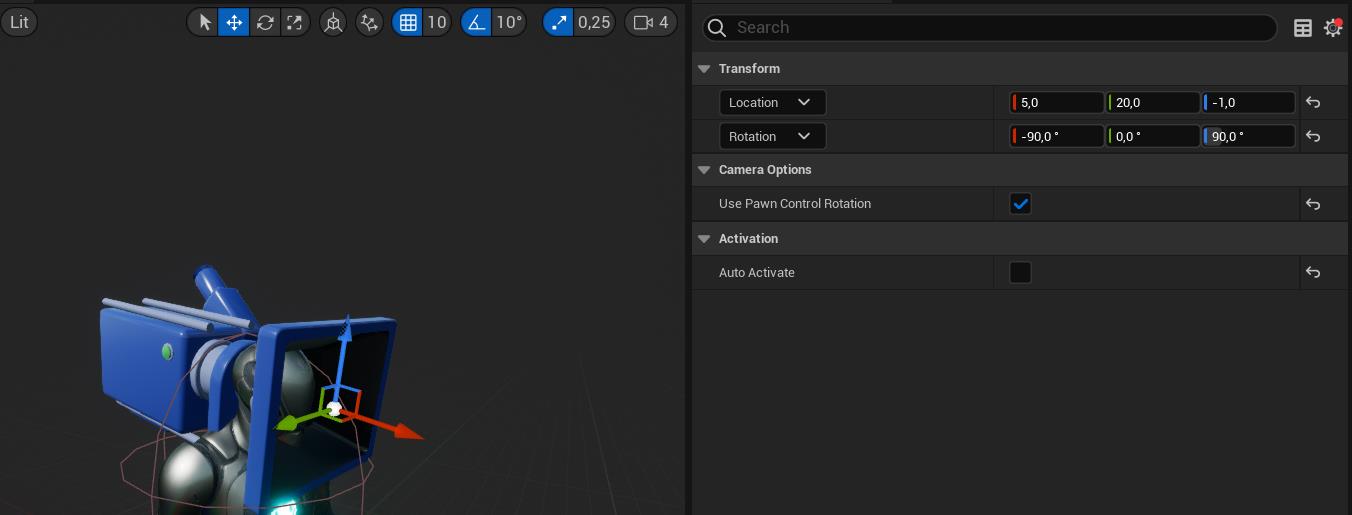
If your character does not have an FPS camera, open **BP\_DemoCharacter** in the phone system.\
Copy the camera component called **FPSCamera** and add it to your character.\
Then make the necessary location and rotation adjustments.
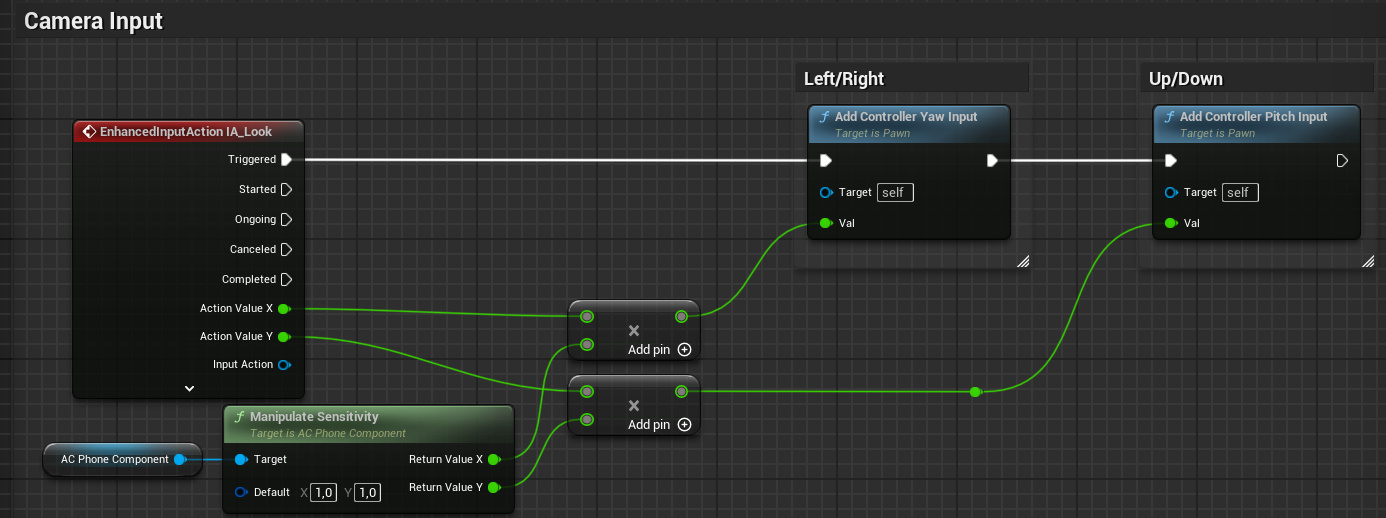
\*To reduce mouse sensitivity while using the camera zoom, use the Manipulate Sensitivity function from the AC\_PhoneComponent. Multiply your Input Action values by the return values of this function as shown in the image below. This will ensure your camera movement feels smooth and controlled during zoom.
{% endstep %}
{% step %}
### Character Mesh Setup
To manage phone animations correctly, select your character's Mesh in the Character. In the Details panel, search for Tags and add the tag: **CharacterMesh**.
{% endstep %}
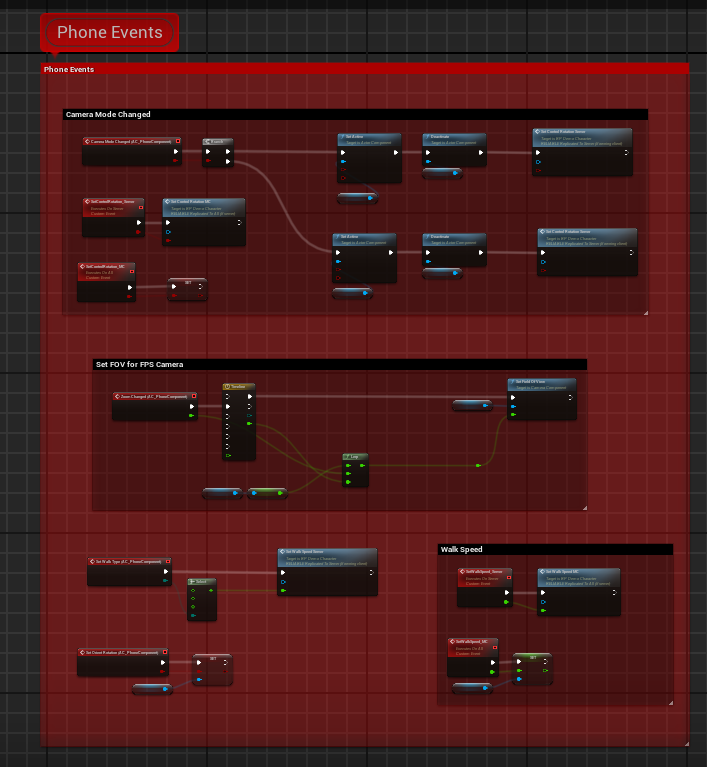
{% step %}
### Event Graph Integration
Copy the code from the "Phone Events" comment blocks in **BP\_DemoCharacter**.\
Paste it into the Event Graph in your Character Blueprint.
{% endstep %}
{% endstepper %}